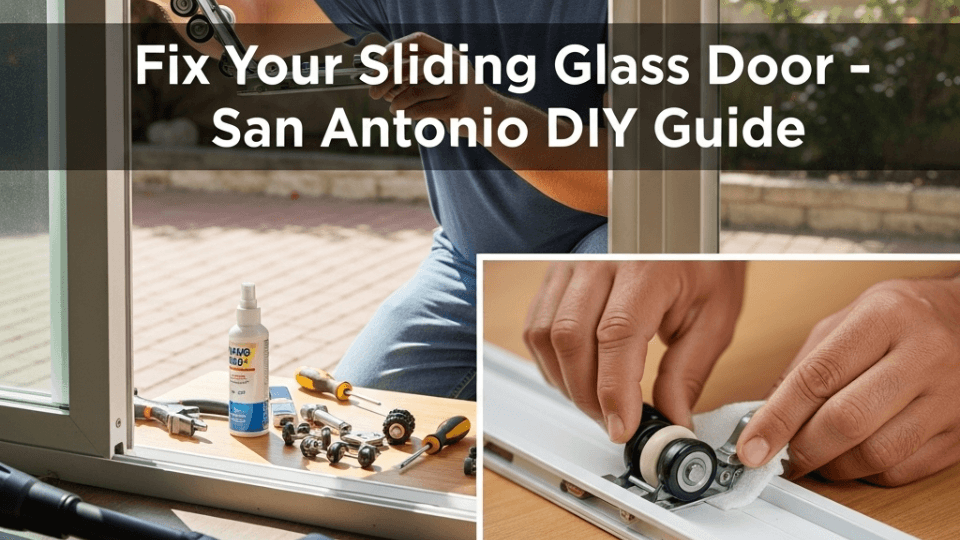
How to Repair a Sliding Glass Door: The Ultimate DIY Guide for San Antonio Homeowners
Is your sliding glass door driving you crazy? Whether it’s scraping, sticking, or refusing to close properly, learning how to repair a sliding glass door can save you hundreds of dollars in professional service calls. This comprehensive guide will walk you through every step of the process, from diagnosing the problem to completing the repair yourself.
Living in San Antonio’s climate means your sliding doors face unique challenges – from humidity affecting the tracks to temperature fluctuations causing alignment issues. The good news? Most sliding door problems are surprisingly simple to fix with the right knowledge and tools.
Section 1: Interactive Symptom Checker: What’s Actually Wrong with Your Door?
Before diving into repairs, let’s identify exactly what’s causing your sliding door headaches. Use this diagnostic table to pinpoint your specific issue:
| Symptom | Likely Cause | Go To Section |
|---|---|---|
| Door is jerky, scrapes, or very hard to move | Dirty tracks or worn-out rollers | Section 3 |
| Door is wobbly or jumps off the track | Misaligned rollers | Section 4 |
| Latch won’t catch or lock properly | Misaligned latch or door frame | Section 5 |
| You feel drafts or see moisture buildup | Failed weatherstripping | Section 6 |
| Door makes grinding or squeaking noises | Debris in tracks or dry rollers | Section 3 |
| Handle feels loose or doesn’t engage | Loose hardware or worn latch mechanism | Section 5 |
Pro Tip: If you’re experiencing multiple symptoms, start with Section 3 (cleaning and roller maintenance) as dirty tracks often cause cascading problems.
Section 2: The DIYer’s Toolkit: Everything You’ll Need
Having the right tools makes the difference between a frustrating afternoon and a successful repair. Here’s your comprehensive toolkit:
The Essentials (For Basic Maintenance)
- Stiff brush (old toothbrush works great)
- Putty knife (for scraping stubborn debris)
- Shop vacuum (crucial for thorough cleaning)
- Screwdriver set (both Phillips and flathead)
- Silicone spray lubricant (never use WD-40!)
- Clean rags or paper towels
- Flashlight or headlamp
For Roller Replacement Projects
- Pry bar (24-inch recommended)
- Wood blocks (to protect the door frame)
- Replacement rollers (measure first!)
- Drill with bits (if pilot holes are needed)
- Level (for proper alignment)
- Helper (absolutely essential for safety)
Pro-Tip: Why Silicone Lubricant is Your Best Friend (and Why You Should Never Use WD-40 on Tracks)
Silicone spray lubricant is specifically designed for sliding door tracks because it:
- Doesn’t attract dirt and debris like oil-based lubricants
- Remains effective in temperature extremes
- Won’t gum up over time
- Provides long-lasting protection
Never use WD-40 on sliding door tracks! While it’s great for many applications, WD-40 is a penetrating oil that attracts dirt and dust, making your track problems worse over time.
Section 3: The Most Common Fix: Cleaning Tracks & Replacing Rollers (The Complete Project)
This is where most sliding door problems begin and end. A thorough cleaning and roller inspection will solve 80% of sliding door issues.
Safety First: Removing the Heavy Door
⚠️ Critical Safety Note: Never attempt this alone. Sliding glass doors typically weigh 100-200 pounds and can cause serious injury if dropped.
Step-by-Step Door Removal:
- Clear the area – Remove furniture and ensure a clear path
- Position your helper – One person on each side of the door
- Locate the adjustment screws – Usually found at the bottom corners
- Raise the door slightly – Turn adjustment screws clockwise to lift
- Grip properly – Use both hands, fingers on the sides (never the glass)
- Lift and pull – Lift up about ¼ inch and pull toward you
- Set down carefully – Use wood blocks to protect the door
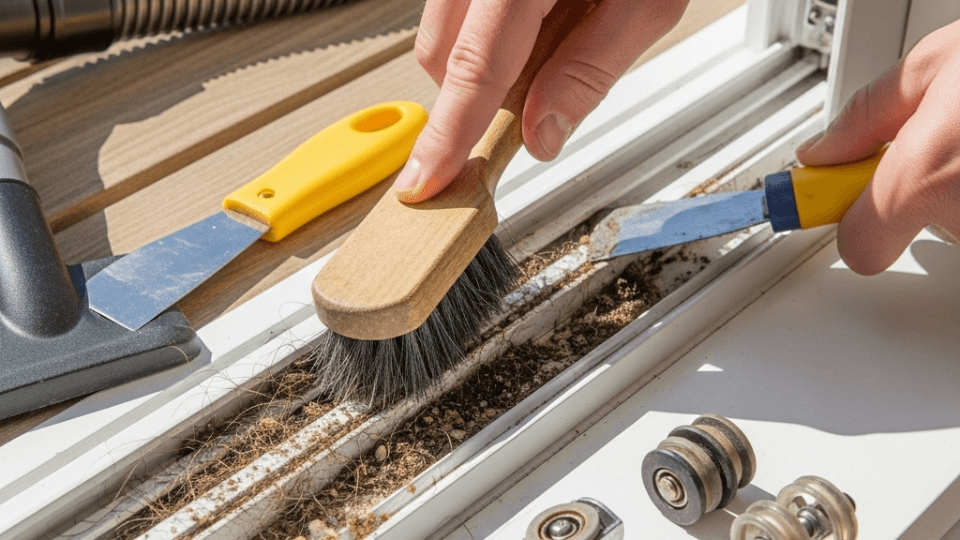
Deep Cleaning the Tracks
What you’ll find in there might shock you! San Antonio’s dusty conditions mean tracks accumulate:
- Sand and grit
- Dead insects
- Pet hair
- Paint chips
- Rust particles
Cleaning Process:
- Vacuum first – Remove loose debris with shop vac
- Scrape stubborn buildup – Use putty knife at 45-degree angle
- Brush thoroughly – Stiff brush gets into track grooves
- Vacuum again – Remove all loosened debris
- Wipe clean – Damp cloth for final cleaning
- Let dry completely – Moisture causes more problems
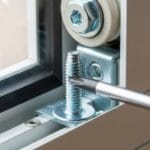
Inspecting and Removing Old Rollers
Signs you need sliding glass door roller replacement:
- Visible wear on roller wheels
- Cracked or broken roller housing
- Rollers don’t spin freely
- Metal shavings in tracks
Removal Process:
- Locate roller assemblies – Usually 2-4 per door
- Remove screws – Typically 2-3 Phillips head screws per roller
- Note orientation – Take photos before removal
- Carefully extract – Rollers may be stuck with debris
Buying the Right Replacement Rollers
This is crucial! Bring your old rollers to the hardware store or measure carefully:
- Wheel diameter (usually 1-2 inches)
- Housing dimensions (length, width, height)
- Screw hole spacing
- Weight capacity (check door specifications)
Common Types:
- Tandem rollers – Two wheels per assembly (heavy doors)
- Single rollers – One wheel per assembly (lighter doors)
- Steel wheels – Durable but noisy
- Nylon wheels – Quieter operation, may wear faster
Installation and Re-hanging
- Install new rollers – Reverse removal process
- Adjust height – Use adjustment screws for proper fit
- Test movement – Rollers should spin freely
- Rehang door – Reverse removal process with helper
- Fine-tune alignment – Use adjustment screws for smooth operation
Section 4: The Alignment Fix: How to Adjust Rollers for a Perfect Glide
Sometimes your door just needs a tune-up rather than major repairs. Here’s how to fix a stuck sliding glass door through proper alignment:
Finding the Adjustment Points
Bottom Track Adjustments:
- Look for plastic caps or small holes at the bottom corners of the door
- These cover the adjustment screws for each roller assembly
- Use a screwdriver to access (remove caps first)
The Adjustment Process
Remember: “Righty-Tighty, Lefty-Loosey”
- Clockwise (right) = Raises the door
- Counterclockwise (left) = Lowers the door
Step-by-Step Alignment:
- Check current gaps – Measure gap between door and frame
- Adjust gradually – Make small turns (quarter-turn increments)
- Test frequently – Slide door after each adjustment
- Achieve even gaps – Top and bottom should be parallel
- Final test – Door should glide smoothly without binding
Common Alignment Issues in San Antonio
The foundation settling common in San Antonio clay soil can cause:
- Doors dragging on bottom track
- Uneven gaps around the door
- Difficulty closing completely
Quick Fix: Minor adjustments can compensate for small foundation shifts.
Section 5: Latch and Lock Repair
Security is paramount, especially for patio doors. Here’s how to restore proper latch and lock function:
Diagnosing Latch Problems
Common Issues:
- Latch doesn’t engage strike plate
- Handle feels loose or wobbly
- Lock mechanism sticks or won’t turn
- Door won’t stay closed
Strike Plate Adjustment
Tools needed: Screwdriver, pencil, metal file
- Test latch alignment – Close door and check where latch hits
- Mark strike plate – Use pencil to mark contact points
- Adjust strike plate position – Loosen screws and shift slightly
- File if necessary – Enlarge strike plate opening if needed
- Tighten and test – Secure screws and test operation
Handle and Lock Mechanism
Tightening Loose Handles:
- Remove handle – Usually 2-3 screws from interior side
- Check mechanism – Look for worn or broken parts
- Tighten connections – Ensure all screws are secure
- Lubricate moving parts – Use silicone spray sparingly
- Reassemble and test – Verify smooth operation
Section 6: Banish Drafts: How to Replace Weatherstripping
San Antonio’s temperature swings make proper weatherstripping essential for energy efficiency.
Identifying Weatherstripping Problems
Signs of failure:
- Visible cracks or splits
- Hardened, brittle material
- Gaps when door is closed
- Increased energy bills
- Moisture infiltration
Replacement Process
Materials needed:
- Replacement weatherstripping (measure first!)
- Utility knife
- Measuring tape
- Scissors
Installation Steps:
- Remove old weatherstripping – Pull out from groove
- Clean the channel – Remove adhesive residue
- Measure and cut – New stripping to exact length
- Install new stripping – Press firmly into groove
- Test door operation – Should close without excessive force
Choosing the Right Weatherstripping
Types available:
- Vinyl – Affordable, good for most applications
- Rubber – Better durability, more expensive
- Brush-style – Good for uneven surfaces
- Magnetic – Excellent seal, premium option
Section 7: When to Call a Pro: Know Your Limits
While many sliding door repairs are DIY-friendly, some situations require professional expertise:
Definitely Call a Professional For:
Safety Hazards:
- Cracked or shattered glass
- Broken door frame
- Door completely off track and stuck
Structural Issues:
- Bent or severely damaged track
- Frame alignment problems
- Signs of foundation settling affecting multiple doors/windows
Complex Repairs:
- Glass replacement
- Frame modifications
- Warranty work on newer doors
Red Flags in San Antonio
Given our local conditions, watch for:
- Water damage around the door frame
- Cracks in the foundation near the door
- Multiple doors in the home having similar issues
Quote from a San Antonio contractor: “I see a lot of DIY repairs gone wrong because people didn’t recognize when the problem was bigger than just a dirty track. Know your limits and don’t be afraid to call for help.”
Section 8: Comprehensive FAQ
Q: How often should I maintain my sliding glass door?
A: Clean tracks monthly and lubricate every 3-6 months. In San Antonio’s dusty environment, you might need to clean more frequently during windy seasons.
Q: Can I replace just one roller, or do I need to replace them all?
A: While you can replace individual rollers, it’s best practice to replace all rollers at the same time to ensure even wear and smooth operation.
Q: My door is 20 years old. Should I repair or replace it?
A: If the glass and frame are in good condition, repairs are usually worthwhile. However, if you’re dealing with multiple issues (drafts, security problems, alignment issues), replacement might be more cost-effective.
Q: What’s the difference between cleaning and lubricating tracks?
A: Cleaning removes debris that causes problems, while lubricating reduces friction. Always clean first, then lubricate – never lubricate dirty tracks!
Q: How do I know if my rollers are the right size?
A: Measure the wheel diameter, housing dimensions, and screw hole spacing. When in doubt, bring the old roller to your hardware store for comparison.
Q: Can weather affect my sliding door operation?
A: Absolutely! San Antonio’s humidity can cause swelling, while temperature changes can affect alignment. Regular maintenance helps compensate for weather-related issues.
Q: Is it normal for my sliding door to make some noise?
A: A slight whooshing sound is normal, but grinding, scraping, or squeaking indicates problems that need attention.
Conclusion: Your Sliding Door Success Story
Learning how to repair a sliding glass door isn’t just about fixing current problems – it’s about preventing future issues and maintaining your home’s security and energy efficiency. Whether you’re dealing with a simple cleaning job or need sliding glass door roller replacement, the techniques in this guide will serve you well.
Remember, most sliding door problems in San Antonio are caused by our dusty environment and temperature fluctuations. Regular maintenance is your best defense against major repairs. Start with the basics – cleaning and lubrication – and work your way up to more complex repairs as needed.
Key Takeaways:
- Clean tracks monthly to prevent major problems
- Use silicone lubricant, never WD-40
- Replace all rollers at the same time for best results
- Know when to call a professional
- Regular maintenance saves money in the long run
Your sliding glass door should glide effortlessly, providing years of reliable service. With the knowledge from this guide, you’re equipped to keep it operating smoothly, no matter what San Antonio’s weather throws at it.
Our branches in the United States
Our branches in the world
Get Your Free Window Repair Estimate Today!
Don’t let window damage compromise your home’s comfort and efficiency.
Contact Windows and Doors Repair LLC
(281) 595-0406
✉️ contact@windowsdoorsrepair.com